How to Render Markdown Document in React
Let us implement rendering markdown in React and we'll embark on fundamental conceptions of Markdown compiling procession with usages and examples for unified plugins.
Concept
Markdown is a lightweight markup language designed for creating formatted text using plain text syntax. It supports basic document elements such as headings, bold/italic/underline text, blockquotes, code blocks, and links. It is particularly suitable for writing notes, documentation, and blog posts. However, Markdown documents must first be parsed by a compiler to identify the elements and formatting, and then rendered by a reader to display the formatted document.
If I want to develop a personal blog website using React, where the blog posts are written in Markdown, how can I render Markdown documents in React?
This article uses unified.js as an example. Unified.js is an open-source content processing system that, among other things, compiles markup text like Markdown and HTML into machine-readable abstract syntax trees (AST). It also supports plugins to modify these texts and compile them into other machine-renderable formats (e.g., DOM, React objects, etc.).
Before diving in, let's clarify some key concepts:
- Markup Text: A form of text that combines content with structural and formatting information. It uses specific markup to describe the structure, style, and other attributes of the text. These markups typically appear as tags embedded in the text, indicating how the content should be displayed or processed. Examples include Markdown and HTML.
- Abstract Syntax Tree (AST): To enable machines to understand the meaning of markup in Markdown or HTML, the text must be converted into a machine-readable form. This process is called compilation, and the result is an abstract syntax tree.
- hast (HTML Abstract Syntax Tree): The AST for HTML.
- mdast (Markdown Abstract Syntax Tree): The AST for Markdown text.
- Syntax Tree Transformation: The process of converting one syntax tree into another, such as transforming mdast into hast or vice versa. Since HTML and Markdown are both markup languages, they share many similarities, allowing their syntax trees to be mutually convertible under certain conditions.
- Compilation Input: The process of converting markup text into an AST. For example, converting Markdown to mdast is a compilation input.
- Compilation Output: The process of converting an AST into a renderable data structure. For example, generating HTML code from hast is a compilation output, producing the final compiled result.
Browsers do not natively support rendering Markdown documents. Therefore, Markdown text is typically first converted into HTML DOM before being rendered in the browser.
Thus, the workflow for writing Markdown text and rendering it in a browser is as follows:
Markdown Text => mdast => hast => HTML => Render HTML
Unified.js is a "pipeline" integrator. It does not process text content directly but relies on plugins to handle the text.
Before using unified.js, let's clarify some of its key concepts:
- Entry Plugin: Implements compilation input, converting plain markup text into mdast or hast syntax trees. For example,
remark-parseconverts Markdown text into mdast, whilerehype-parseconverts HTML text into hast. Entry plugins take text content as input and output mdast or hast. - AST Conversion Plugin: Implements the conversion between mdast and hast syntax trees. For example,
remark-rehypeconverts mdast into hast, whilerehype-remarkconverts hast into Markdown. These plugins take mdast as input, convert it, and output hast, or vice versa. - Remark Plugin: Modifies mdast during the compilation process. By altering mdast, these plugins reprocess the structure of Markdown and output the modified mdast.
- Rehype Plugin: Modifies hast during the compilation process. By altering hast, these plugins reprocess the structure of HTML and output the modified hast.
- Output Plugin: Implements compilation output, converting mdast or hast into the final compiled result. For example,
rehype-stringifyconverts hast into HTML text, which can be directly rendered by browsers.rehype-reactconverts hast into React JSX elements, producing renderable React components.
Among these plugins, entry plugins, AST conversion plugins, and output plugins are considered special plugins.
Implementation
In React, combining the workflow from Markdown to browser rendering, it becomes clear how to handle Markdown text in React.
The following flowchart demonstrates the sequence of plugin calls during the compilation process:
                      Markdown Text
                         ↓
                    +----------------+
                    | Entry Plugin   |
+------------------ | (Remark-parse) |----------------+
|  unified.js       +----------------+                |
|                        ↓ mdast                      |
|                   +-----------------------+         |
|                   | Syntax Convert Plugin |         |
|                   |    (remark-rehype)    |         |
|                   +-----------------------+         |
|                        ↓ hast                       |
|                   +------------------+              |
|                   |  Output Plugin   |              |
+-------------------|  (Rehype-react)  |--------------+
                    +------------------+
                         ↓
                    React JSX Element
Ultimately, the Markdown text is compiled into a directly renderable React JSX component.
First, initialize a React project. You can use Next.js or Create React App (CRA). This example uses Next.js. Initialize a Next.js project with the following options:
√ What is your project named? ... react-markdown-example
√ Would you like to use TypeScript? ... Yes
√ Would you like to use ESLint? ... No
√ Would you like to use Tailwind CSS? ... Yes
√ Would you like to use `src/` directory? ... No
√ Would you like to use App Router? (recommended) ... No
√ Would you like to customize the default import alias (@/*)? ... Yes
√ What import alias would you like configured? ... @/*
To add CSS typography support for the rendered Markdown, install the Tailwind CSS typography plugin:
pnpm install -D @tailwindcss/typography
Then, add the typography plugin to the tailwind.config.js file:
/** @type {import('tailwindcss').Config} */
module.exports = {
  theme: {
    // ...
  },
  plugins: [
+   require('@tailwindcss/typography'),
    // ...
  ],
}
Next, install the necessary dependencies:
pnpm i unified remark-parse remark-rehype rehype-react
Unified.js uses a middleware pattern, where any plugin can be treated as middleware. You can chain middleware using the unified.use() method, passing the output of one plugin as the input to the next. Finally, use the process() method to execute the processing. Note that process() is an asynchronous function and requires await.
The code might look like this:
import remarkParse from "remark-parse";
import remarkRehype from "remark-rehype";
import rehypeReact from "rehype-react";
import { unified } from "unified";
import * as production from "react/jsx-runtime";

const processMarkdown = async () => {
  const pipeline = await unified()
    // Entry Plugin, string to mdast
    .use(remarkParse)
    // Syntax convert plugin, mdast to hast
    .use(remarkRehype)
    // Output plugin, hast to React JSX Element
    .use(rehypeReact, production)
    .process(markdownText);
  return pipeline.result;
};
Note the order of plugin calls in the above code. First, the Markdown string is passed to the entry plugin
remark-parse, which outputs mdast. This mdast is then passed to the syntax conversion pluginremark-rehype, which outputs hast. This process continues sequentially. Pay attention to the input and output objects of each plugin to avoid confusion.
Let's test with the following Markdown document:
## This is a heading

hello **world**, _this is italic sentence_
[This is a link](https://example.com)
Integrate this into the Next.js homepage. In the index.ts file, write the following:
import remarkParse from "remark-parse";
import remarkRehype from "remark-rehype";
import rehypeReact from "rehype-react";
import { unified } from "unified";
import * as production from "react/jsx-runtime";
import { Fragment, createElement, useEffect, useState } from "react";

const markdownText = `
## This is a heading
hello **world**, _this is italic sentence_
[This is a link](https://example.com)
  `;

export default function Home() {
  const [element, setElement] = useState(createElement(Fragment));

  const processMarkdown = async () => {
    const pipeline = await unified()
      // Entry Plugin, string to mdast
      .use(remarkParse)
      // Syntax convert plugin, mdast to hast
      .use(remarkRehype)
      // Output plugin, hast to React JSX Element
      .use(rehypeReact, production)
      .process(markdownText);
    return pipeline.result;
  };

  useEffect(() => {
    processMarkdown().then((elem) => setElement(elem));
  }, [markdownText]);

  return (
    <div className="p-5">
      <main className="prose">
        {/* The compiled element will display here. */}
        {element}
      </main>
    </div>
  );
}
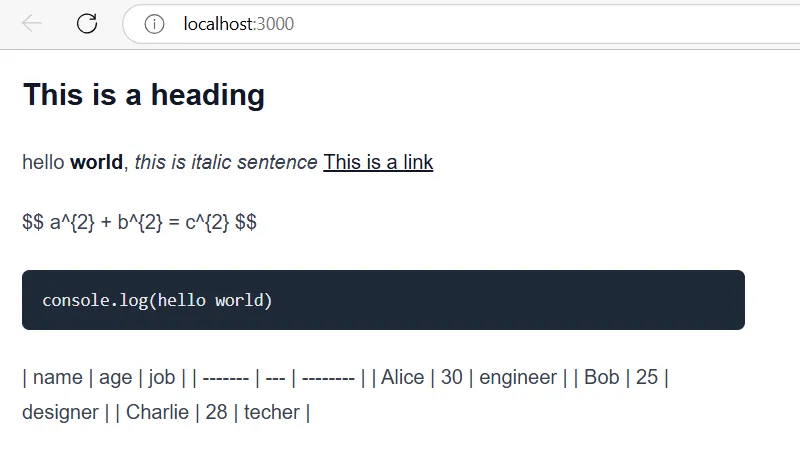
Run the program to preview the result.

As shown, the basic elements of the Markdown document, such as headings, bold text, italics, and links, are successfully compiled into React JSX elements and rendered correctly.
Using Remark and Rehype Plugins
The above example demonstrates the process of compiling Markdown text into React components. However, the remark-parse entry plugin only supports basic Markdown features. Markdown includes many advanced features, such as code block highlighting, mathematical formulas, and tables, which are not supported by default.
Let's try adding some formulas, code blocks, and table syntax to the markdownText:
const markdownText = `

## This is a heading

hello **world**, _this is italic sentence_
[This is a link](https://example.com)

$$
a^{2} + b^{2} = c^{2}
$$

\`\`\`javascript
console.log(hello world)
\`\`\`

| name    | age | job      |
| ------- | --- | -------- |
| Alice   | 30  | engineer |
| Bob     | 25  | designer |
| Charlie | 28  | techer   |

`;
Notice that the formulas and tables are not rendered, and the code blocks are not highlighted.
Next, let's add support for code block highlighting, formulas, and table rendering to our Markdown text.
To support advanced features like formulas, code block highlighting, and tables, additional plugins are required. This introduces the Remark and Rehype plugins mentioned earlier.
In the above example, formulas and tables are not rendered because the remark-parse entry plugin only recognizes basic Markdown syntax. It does not support advanced features like formula blocks and tables, so the generated syntax tree does not include the corresponding structures.
Thus, the mdast generated by remark-parse is incomplete. To ensure mdast includes the necessary structures for formula blocks and tables, we need to extend its syntax recognition capabilities using plugins like remark-gfm and remark-math. These plugins recognize syntax that remark-parse cannot and generate the corresponding structures.
remark-gfmrecognizes table syntax.remark-mathrecognizes formula block syntax.
Once mdast includes the structures for code blocks, formulas, and tables, it is converted into hast using a syntax tree conversion plugin. However, while hast now includes these structures, the corresponding HTML class attributes do not yet have CSS styles. Code blocks and formulas require external CSS-defined classes to display correctly.
To ensure the generated HTML structures are rendered correctly, we need to further process hast using Rehype plugins. These plugins modify hast to add CSS classes to the HTML structures for code blocks and formulas. Specifically, we use rehype-katex to add styles for mathematical formulas and rehype-highlight to add highlighting styles for code blocks.
Combining these steps, the document compilation workflow looks like this:
                      Markdown Text
                         ↓
                    +----------------+
                    | Entry Plugin   |
+------------------ | (remark-parse) |----------------+
|  unified.js       +----------------+                |
|                        ↓ mdast                      |
|  +-------------------- ↓ ---------------------+     |
|  | Remark Plugins      ↓ mdast                |     |
|  |               +----------------+           |     |
|  |               | remark-gfm     |           |     |
|  |               +----------------+           |     |
|  |                     ↓ mdast                |     |
|  |               +----------------+           |     |
|  |               | remark-math    |           |     |
|  |               +----------------+           |     |
|  +-------------------- ↓ ---------------------+     |
|                        ↓ mdast                      |
|                  +-----------------------+          |
|                  | Syntax Convert Plugin |          |
|                  |    (remark-rehype)    |          |
|                  +-----------------------+          |
|                        ↓ hast                       |
|  +-------------------- ↓ ---------------------+     |
|  | Rehype Plugins      ↓ hast                 |     |
|  |               +----------------+           |     |
|  |               | rehype-katex   |           |     |
|  |               +----------------+           |     |
|  |                     ↓ hast                 |     |
|  |               +------------------+         |     |
|  |               | rehype-highlight |         |     |
|  |               +------------------+         |     |
|  +-------------------- ↓ ---------------------+     |
|                        ↓ hast                       |
|                  +------------------+               |
|                  |  Output Plugin   |               |
+------------------|  (rehype-react)  |---------------+
                   +------------------+
                         ↓
                    React JSX Element
Install these Remark and Rehype plugins, along with other necessary dependencies:
pnpm i remark-gfm remark-math rehype-katex rehype-highlight katex highlight.js
Then, update the code as follows:
import remarkParse from "remark-parse";
import remarkRehype from "remark-rehype";
import rehypeReact from "rehype-react";
import remarkGfm from "remark-gfm";
import remarkMath from "remark-math";
import rehypeHighlight from "rehype-highlight";
import rehypeKatex from "rehype-katex";
import { unified } from "unified";
import * as production from "react/jsx-runtime";
import { Fragment, createElement, useEffect, useState } from "react";
import "highlight.js/styles/dark.css"; // import css file for code highlight theme.
import "katex/dist/katex.css"; // import css file for formula blocks.

const markdownText = `

## This is a heading

hello **world**, _this is italic sentence_
[This is a link](https://example.com)

$$
a^{2} + b^{2} = c^{2}
$$

\`\`\`javascript
console.log(hello world)
\`\`\`

| name    | age | job      |
| ------- | --- | -------- |
| Alice   | 30  | engineer |
| Bob     | 25  | designer |
| Charlie | 28  | techer   |

`;

export default function Home() {
  const [element, setElement] = useState(createElement(Fragment));

  const processMarkdown = async () => {
    const pipeline = await unified()
      // Entry Plugin, string to mdast
      .use(remarkParse)
      // Add remark-gfm to recognize table syntax
      .use(remarkGfm)
      // Add remark-math to recognize the formula-block syntax
      .use(remarkMath)
      // Syntax convert plugin, mdast to hast
      .use(remarkRehype)
      // Use rehype-katex to add formula styles to formula block.
      .use(rehypeKatex)
      // Use rehype-highlight to add css classes for elements in code block to make them stylified.
      .use(rehypeHighlight, { detect: true })
      // Output plugin, hast to React JSX Element
      .use(rehypeReact, production)
      .process(markdownText);
    return pipeline.result;
  };

  useEffect(() => {
    processMarkdown().then((elem) => setElement(elem));
  }, [markdownText]);

  return (
    <div className="p-5">
      <main className="prose">
        {/* The compiled element will display here. */}
        {element}
      </main>
    </div>
  );
}
Finally, run the program to preview the result.
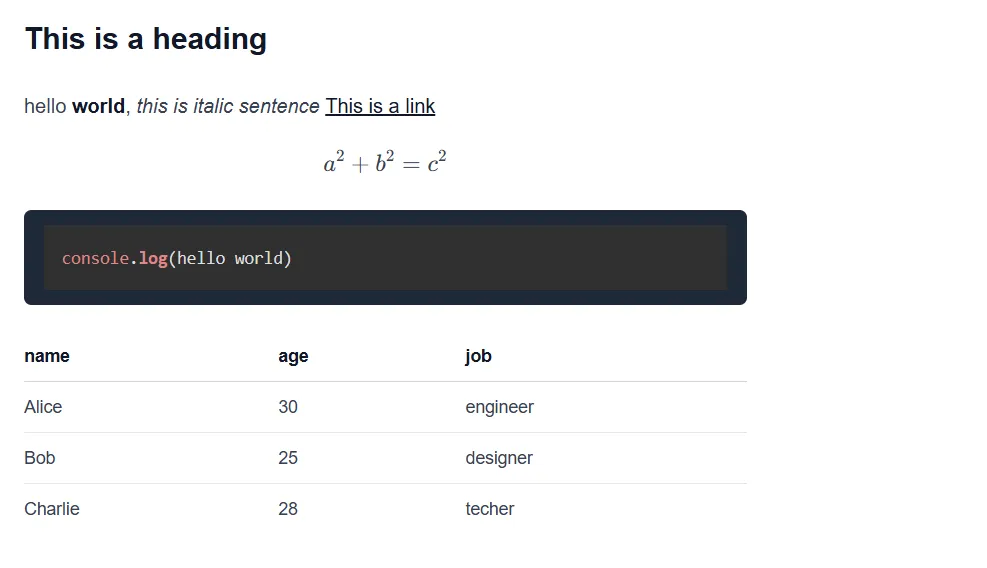
Tables, formulas, and code highlighting are now rendered correctly.
Custom Elements
The above sections cover the basics of compilation and rendering. Now, let's explore a more advanced feature. When inserting images into Markdown documents, I sometimes want to add a caption below the image.
For example, adding a small caption below the image:

In Markdown, the image syntax allows you to include an alt text as a description:

However, after compilation and rendering, this description is not visible. We know that Markdown's image syntax is compiled into an <img /> element, and the alt attribute is passed to this element. But we can create a custom element to replace the <img /> element with a custom image component during compilation.
rehype-react provides a components option that allows replacing default HTML elements with custom elements.
Create a components/customImg.tsx file and write a custom Image component that receives the alt text from props and displays it:
export const customImg = (props: JSX.IntrinsicElements["img"]) => {
  // Now you can receive origin img attributes by props.
  return (
    <div className="flex flex-col">
      <img className="mx-auto my-0" src={props.src} />
      <figcaption className="p-0 text-center mx-auto text-sm text-gray-500">
        {props.alt}
      </figcaption>
    </div>
  );
};
In the above code, you can use props to receive the original src, alt, and other attributes of the img element.
Then, configure the components option in the rehype-react call. This ensures that during hast compilation, the img element is automatically replaced with our custom customImg component.
Update the code as follows:
import remarkParse from "remark-parse";
import remarkRehype from "remark-rehype";
import rehypeReact from "rehype-react";
import remarkGfm from "remark-gfm";
import remarkMath from "remark-math";
import rehypeHighlight from "rehype-highlight";
import rehypeKatex from "rehype-katex";
import { unified } from "unified";
import * as production from "react/jsx-runtime";
import { Fragment, createElement, useEffect, useState } from "react";
import { customImg } from "@/components/customImg";
import "highlight.js/styles/dark.css"; // import css file for code highlight theme.
import "katex/dist/katex.css"; // import css file for formula blocks.
const markdownText = `

Mount Everest attracts many climbers, including highly experienced mountaineers. There are two main climbing routes, one approaching the summit from the southeast in Nepal (known as the "standard route") and the other from the north in Tibet.
`;
export default function Home() {
const [element, setElement] = useState(createElement(Fragment));
const processMarkdown = async () => {
const pipeline = await unified()
// Entry Plugin, string to mdast
.use(remarkParse)
// Add remark-gfm to recognize table syntax
.use(remarkGfm)
// Add remark-math to recognize the formula-block syntax
.use(remarkMath)
// Syntax convert plugin, mdast to hast
.use(remarkRehype)
// Use rehype-katex to add formula styles to formula block.
.use(rehypeKatex)
// Use rehype-highlight to add css classes for elements in code block to make them stylified.
.use(rehypeHighlight, { detect: true })
// Output plugin, hast to React JSX Element
.use(rehypeReact, { ...production, components: { img: customImg } })
.process(markdownText);
return pipeline.result;
};
useEffect(() => {
processMarkdown().then((elem) => setElement(elem));
}, [markdownText]);
return (
<div className="p-5">
<main className="prose">
{/* The compiled element will display here. */}
{element}
</main>
</div>
);
}
Run the code, and the result is as expected.

Alternative Implementations
Using unified.js in React can be somewhat cumbersome. You can encapsulate it into a standalone component. Alternatively, the community provides a simpler React library called react-markdown, which abstracts away the unified.js pipeline for entry plugins, syntax tree conversion plugins, and output plugins. You only need to pass Remark and Rehype plugins, and it works out of the box.
npm i react-markdown
Then, simply call the React component:
import remarkMath from "remark-math";
import remarkGfm from "remark-gfm";
import rehypeKatex from "rehype-katex";
import rehypeHighlight from "rehype-highlight";
import ReactMarkdown from "react-markdown";

const Post = (props: { markdownText: string }) => {
  return (
    <ReactMarkdown
      remarkPlugins={[remarkMath, remarkGfm]}
      rehypePlugins={[
        () => rehypeKatex({ strict: false }),
        () => rehypeHighlight({ detect: true }),
      ]}
    >
      {props.markdownText}
    </ReactMarkdown>
  );
};

export default Post;
This will render the Markdown text.
Other Plugins
In addition to the plugins mentioned in this article, there are many other Remark and Rehype plugins available on GitHub. Here are the official Remark plugin list and Rehype plugin list.
Below are some notable Remark and Rehype plugins:
-
remark-lint - A Markdown linter that automatically fixes syntax errors in Markdown.
-
remark-toc - Adds a Table of Contents to Markdown documents.
-
remark-gfm - Supports additional Markdown syntax, such as todo lists, tables, and footnotes.
-
remark-math - Supports mathematical formula blocks in Markdown.
-
remark-frontmatter - Supports frontmatter syntax in Markdown.
-
rehype-raw - Supports custom HTML embedded in Markdown.
-
rehype-slug - Adds IDs to headings.
-
rehype-autolink-headings - Adds self-referencing links to headings with
rel="noopener noreferrer". -
rehype-sanitize - Sanitizes HTML to ensure safety and prevent XSS attacks.
-
rehype-external-link - A custom plugin that adds
target="_blank"andrel="noopener noreferrer"to external links. -
rehype-mermaid - A custom plugin for rendering diagrams and charts using Mermaid. The architecture diagram in this article was rendered using Mermaid.
-
rehype-embed - A custom plugin for automatically embedding cards from YouTube, Twitter, GitHub, etc., based on links.
-
rehype-remove-h1 - A custom plugin that converts
h1elements intoh2.
Optimization
The speed and performance of unified.js in processing documents depend on the plugins used. Generally, the more Remark or Rehype plugins you use, the slower the processing speed. Therefore, it is essential to use Remark and Rehype plugins judiciously and remove unnecessary ones. Additionally, writing high-performance Remark and Rehype plugins is crucial.
Most Remark and Rehype plugins are synchronous, but some are asynchronous. Using asynchronous plugins can avoid blocking and improve performance.
In the future, I will document how to write Remark and Rehype plugins.
Source Code Reference
The example project from this article is available on GitHub. Readers can download, run, and learn from it.
In addition to this article, you can refer to the following resources: